Job Reproduction
Imagine you had a last-minute, high-priority job for a customer. It was complex to print and required a lot of effort from both the print operator and Prepress team to get everything just right.
Weeks go by, and the customer is so impressed with the results that they now want to print all their future jobs with you. Specifically, they want to reprint the same job.
The problem? During the rush, you didn't have time to properly document all the tweaks and tricks the operator used. Now you're facing the challenge of reproducing that job exactly as before.
Durst Analytics to the rescue!
The goal is to find the exact job and its print settings, so you can reproduce it under the same conditions, ensuring the same quality outcome for the customer.
- Start with the Printer Jobs page.
- If needed, use the Excel Export for advanced inspection.
- Identify the most successful production run and extract all print settings from it.
Tools and Data Sources
To start your investigation, head to the Printer Jobs section.
There, you’ll find your complete job history, including all key details that help you understand how a job was produced. The system tracks every print job along with the settings it was printed with.
You can see the job history, view different adjustments made during the run, and identify the specific version of the job that was actually printed successfully.
Common Challenges
Depending on the complexity of the job, you might need to investigate multiple sources:
-
Printer Jobs page
Ideal for a high-level overview of job settings and print history. -
Excel Export
Some jobs involve many fine-grained adjustments that would clutter the frontend view. If you suspect multiple settings influenced the output quality, download the Excel Export for the full dataset. -
Naming Confusion
A poorly named job can make it hard to track down. If your naming convention isn’t consistent or if there are many duplicate names, filtering the right job can become a hassle.
To avoid confusion, use a consistent and meaningful naming convention for all jobs.
Example
Let’s say the job name was:
CEC_20mm_final_2024-25 and it was printed in November 2024.
-
Search the job in the Printer Jobs page.
You might see multiple entries with the same job name.
-
Why multiple entries?
The job was sent once but processed with different settings, each version created a new queue entry.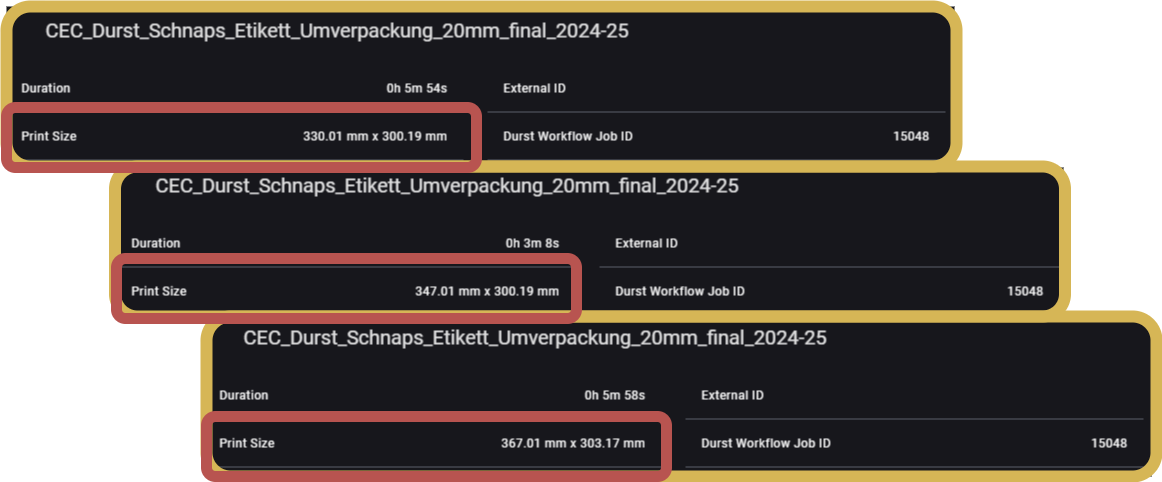
The system groups jobs only if the printer settings and parameters are exactly the same.
-
Identify the final print used for production.
From the operator, you know the last version was used. Click it to view aggregated production metrics and individual runs: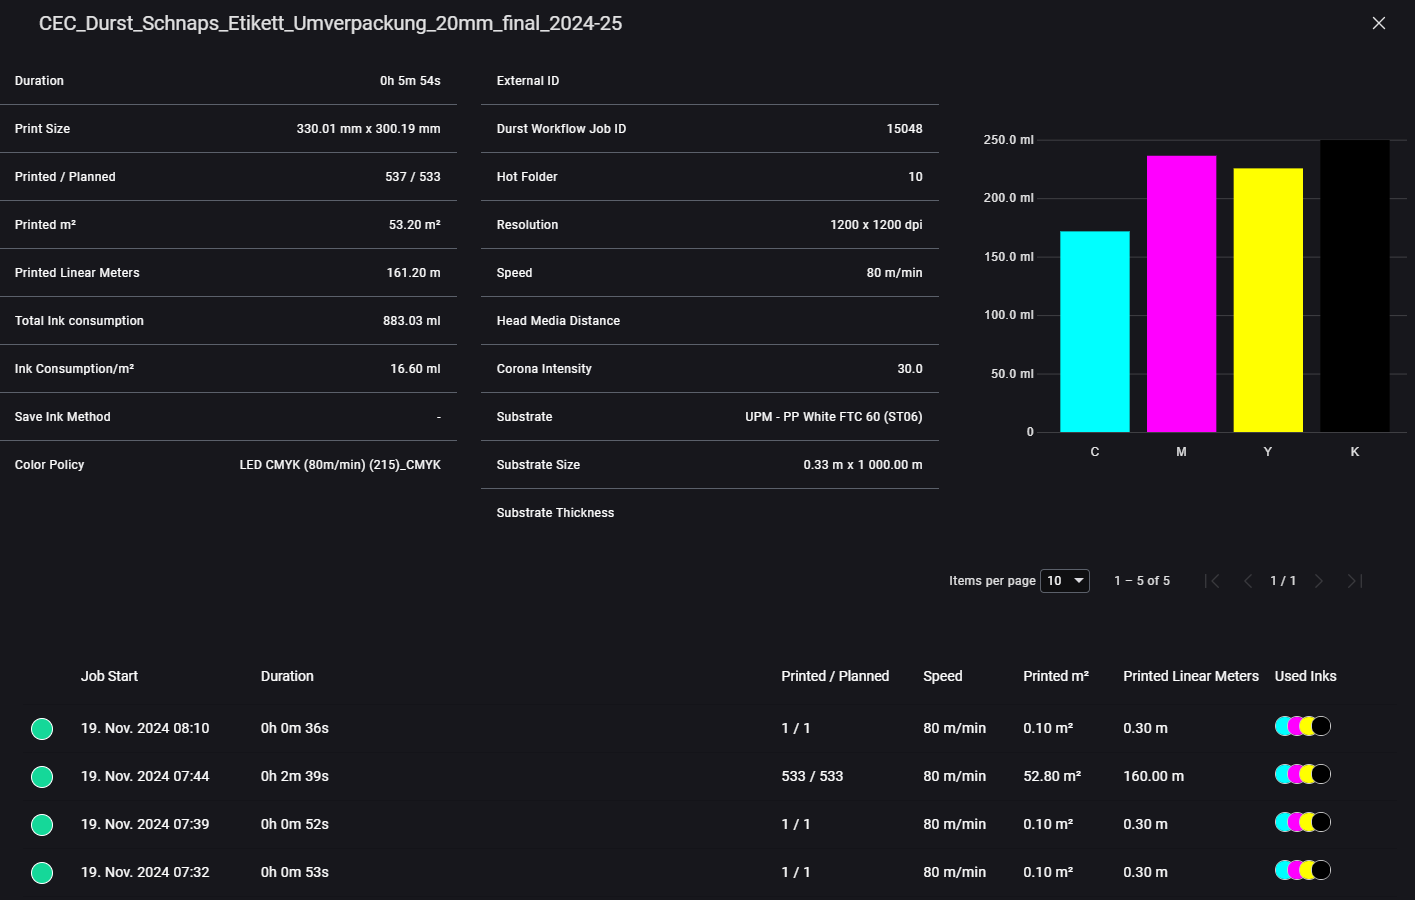
-
Drill down into the actual print run.
In this case, 533 copies were printed on 19 Nov 2024 at 07:44. Click again to see all job-specific details like settings, start/end time, ink usage, and more: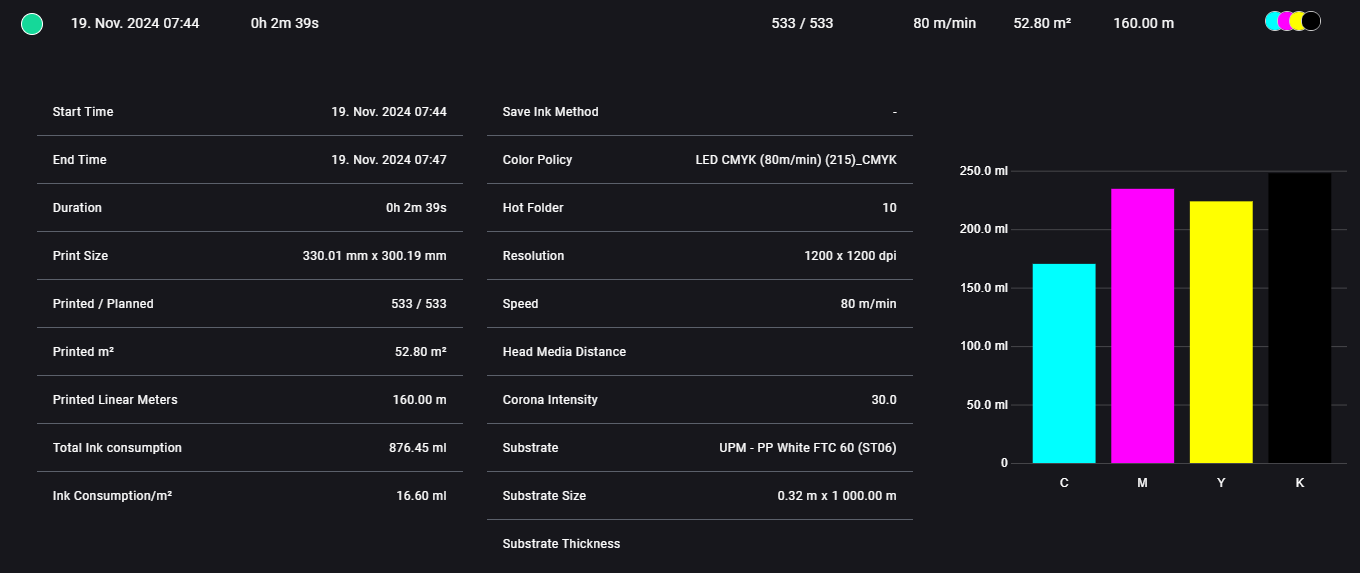
With this, you've retrieved the exact print configuration used, and you're ready to reproduce the job confidently.
You also know how much ink and time was used, giving you a better estimate for future planning.
- Operator actions matter: not all tweaks are tracked digitally. If critical steps were performed manually (for example: substrate alignment, cleaning passes), they might not be reflected in this data and may required further investigation with Printer Events and Maintenance.
- Color profiles and calibrations change over time: compare the printer calibration state now with when the job was first printed.
- Print environment matters: temperature, humidity, and curing conditions may have contributed to the quality and may need to be replicated.